Plastic Welding: Failures of Plastic Welding Joints
Last update on Apr 6, 2008| It seems so easy to produce a good plastic weld. But, is it really so, or are there some hidden failures that might occur that nobody is able to recognize? Well, an expert can probably tell a good weld from a bad weld. When you know what kind of failures can occur, you will have a better understanding of plastic welding and what constitutes a good or a bad plastic joint. As I mentioned in previous articles, there are several things to consider before you start welding. As a reminder, I would like to briefly go over some important considerations or, if you missed my previous articles (which can be found at www.plasticsmag.com), use this as a start. First, there are two primary groups of plastics, thermosets which are not weldable, and thermoplastics which generally are weldable. Don't try to weld thermosets, they won't melt. Basically, different thermoplastics cannot be welded together. Only the same materials can be welded successfully. Use caution with Polyamides (a common trade name is Nylon) or Polyurethanes. These materials come in different grades. Those grades don't automatically fit together. Regardless of the welding system you have, there are always three parameters you need to consider.
So, what is a plastic welding joint failure? We will review charts of weld failures later. The most important consideration is the location where the weld is to be made. There is a difference between an 'indoor shop weld' and an 'outdoor weld' in the wintertime. The range for the weld temperature will change when the environment temperature drops under room temperature. Protect the weld section when the conditions are wet, cold or otherwise not regular. Sometimes a tent or a tarp with a heater can be of help. If you get moisture inside your weld, voids will occur inside the bond of the plastic materials. A good weld shows a perfect mixture between the molecules of the welded plastic materials. If one of the previously mentioned welding parameters is not in specs, the fusion is not completed. Contamination like dust and oil inside the weld will disturb the mixing process. Contagion will occur when the surface and welding rod is not prepared the correct way. Oxidation, dust, grease and damaged material should be removed prior to welding. The only exception is when a welding tool uses a heated tip to pre-heat and penetrate the parent material. The tip melts and pushes the surface to the side. With the right pressure, the molded welding rod gets injected under the surface, inside the weld area. An excellent molecule mix happens and a very strong weld occurs. The right surface preparation is important to avoid failures in the weld right from the start. An ideal tool to do this is a scraping blade. Sanding paper or solvents are not recommended because the dust and the solvent's holdovers will get mixed inside the weld. The angle of the weld area, if this kind of weld has to be done, is also critical. When you choose the wrong angle, the filler material will not be able to fill the whole weld area properly. Voids and cracking lines will occur and you will produce a weak joint. The proper welding system for the application has to be chosen. It doesn't matter what kind you take, always have the three parameters (temperature, pressure, time) in your mind. When using a hot air welding tool, an oxidation automatically appears. This event is not ideal for producing a quality weld. Using a gas such as nitrogen will minimize, but not eliminate the oxidation problem. Another problem might be an air supply that is not clean, dry and oil free. If you have an airline, which shows these symptoms, particles will get blown directly inside the weld. They will work like a shield in between the molecules and prevent the important mixing process. To create a strong weld, we know the material needs to be prepared first. Some plastics, like ABS or Polycarbonate, are hygroscopic (this means they absorb the moisture from the surrounding environment). These hygroscopic materials need to be dried before using them for welding purposes. Estimate the material you need to weld and dry only this amount. This will save time as the drying time depends on the material and the rod quantity. Plastic, when heated, will expend. When it cools down, it will shrink. If the material is not properly fixed in place, it will bend to the welded side (see sketch below). A weld from both sides would be perfect to prevent a cracking area and keep the desired shape. If this is not possible, prepare the weld angle so that the welding rod can reach the other side. In order to keep the shape straight; a fixture should be used. This unit needs to be positioned until the weld is completely cooled down.
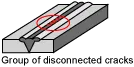
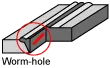
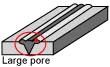
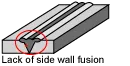
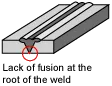
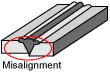
Altogether there are six failure groups of plastic welding to avoid. The following charts will help you recognize these failures. Please note that the listings below are not a valuation or ranking of failures and are not limited to a certain kind of welding process or plastic material.
Sure, different applications may have special requirements and it is not possible to cover them all here. But to give you an idea, I would like to show two simple examples of what considerations you should have in your mind before you start a welding job. |